Phones grew; thumbs did not. On a tall device, the top third of the screen is a two-hand commitment — fine at a desk, awkward on a train strap, impossible with shopping in the other hand. One-handed mode shrinks the display toward the bottom corner so everything is reachable, but the swipe that summons it is easy to forget and easier to fumble. This guide removes the remembering: enable one handed mode apps macrodroid routines switch on for you, in exactly the apps where reach hurts most — and off again when you leave them.
How enable one handed mode apps macrodroid automation is structured
First, what one-handed mode is on modern Android, since it comes in two flavours that automate differently. The shrinking flavour (Samsung’s One-handed mode, similar features on Xiaomi and others) scales the whole interface down toward a corner, optionally for a timed period or until you tap outside it. The reachability flavour (stock Android 12+ one-handed mode) slides the top of the screen down so you can tap what was at the top, then it springs back. Samsung-style persistent shrink is the one that suits per-app automation: you enter it when a reach-heavy app opens and stay in it for the session. Stock Android’s slide-down is a momentary gesture aid; it is designed to be invoked per moment, and there is less to automate — though the gesture that triggers it can still be taught and paired with app contexts.
Second, the honest control question. Whether MacroDroid can switch it depends on the manufacturer’s implementation: some builds expose a settings key (names mentioning one_handed), some accept a shell route, and some guard it behind the vendor’s UI or gesture only. This guide tests first, automates the route your phone offers, and gives a gesture-training fallback for phones with no programmatic route.
How to read this: the estimate adds a small always-on idle cost for MacroDroid itself (about 0.4% of battery per day) to a per-class daily cost for each trigger type you use, scaled slightly by how many macros you run. These are planning estimates from that transparent model — not measurements from your phone. Use them to compare setups before you build, then confirm against the real numbers under Android Settings → Battery.
Permissions and the one-time grant (when keys are involved)
If your build exposes one-handed mode as a secure settings key, writing it needs the WRITE_SECURE_SETTINGS grant — the one-time ADB step documented in granting ADB WRITE_SECURE_SETTINGS to MacroDroid. Grant the Helper too if the change routes through its shell. If the toggle exists only in the vendor’s own settings, no grant helps and none is needed — MacroDroid’s job shrinks to timing and context. Note the version caveat: updates can rename the key or move the feature, so re-test after major updates.
Step 1: identify your build’s route
- Find and enable your one-handed mode manually (Settings → Advanced features on Samsung; Settings → Additional settings on Xiaomi; Settings → System → Gestures on stock Android). Learn its gesture or shortcut until it is muscle memory — you need this for testing and for the fallback design.
- Toggle it off and on while, ideally, watching what changes: if you are comfortable with ADB, diff
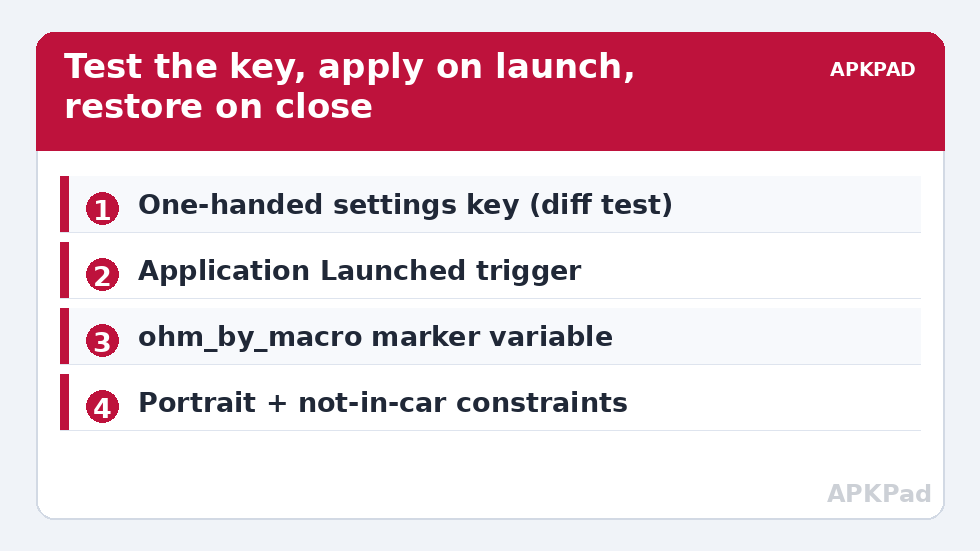
settings list secureandsettings list systembefore and after. A key that flips is your automation route; record its exact name and both values. - If no key flips, test the Helper shell route options mentioned in enthusiast documentation for your exact model — never values from another brand — or accept the gesture route.
- Choose candidate apps by evidence: use your phone one-handed for an hour and note which apps force a stretch — messaging, browsers, feeds with top controls, banking apps. Skip apps you use two-handed at a desk.
Step 2: build the entry macro
- Trigger: Application Launched — your chosen reach-heavy app (start with one; add siblings after a week of success).
- Constraints to consider: only when in portrait (one-handed mode in landscape is rarely the point), only when not connected to a car or desk dock context where the phone is mounted, and — a genuinely useful one — only when the device is not already in one-handed mode, to avoid churning state.
- Action 1: set variable
ohm_by_macro= true (the exit macro will only undo a state the macro created). - Action 2: write the verified one-handed key to its on value, or run the verified shell route.
- Action 3: a small delay, then nothing. Resist adding brightness or layout changes here; if the app also benefits from a density change, that is a separate, separately tested routine like the one in changing screen density per app — stacking two display hacks on one trigger before either is proven is how flickering mysteries are born.
Step 3: build the exit macro
- Trigger: Application Closed for the same app.
- Constraint:
ohm_by_macrois true. - Actions: write the key back to off, clear the variable, and — because some builds keep the shrunken window until it times out — if your build has a timeout behaviour, prefer aligning the macro exit with it during testing so you know which mechanism actually restored full size.
The pattern matches the reading mode in this batch: launch applies a state, close restores it, a marker variable keeps the automation honest. The split-screen multitasking techniques are cousins from the other direction. Both live in the System Tweaks family, gathered from the APKPAD homepage.
The gesture fallback (no programmatic route on your phone)
If your build gives MacroDroid no switch to flip, automation can still carry the awareness burden:
- Context reminder: when a reach-heavy app opens while you are out, show a brief hint: “One-handed: swipe down on the gesture bar.” A week of hints trains the gesture, after which you can delete the trainer.
- Button shortcut: where your build allows assigning one-handed mode to a double-press or nav shortcut, assign it once in system settings; the correct amount of MacroDroid automation on that phone may be zero, and knowing that is a result, not a failure.
Choosing apps: a field guide
| App type | One-handed verdict | Why |
|---|---|---|
| Messaging, chat | Strong yes | Top search/story rows are the classic stretch; typing is better anchored low |
| Browser, reading feeds | Yes | Address bars and top menus dominate; content itself scrolls anywhere |
| Maps while walking | Situational | Great while walking to a place; unhelpful when mounted in a car — constrain by car connection |
| Camera, games, video | No | These use the whole frame by design; shrinking harms the experience and controls |
| Banking, payments | Yes, with care | Reach matters and sessions are short; ensure the shrunken UI still shows full confirmation amounts before approving anything |
Troubleshooting
- The macro writes the key but nothing shrinks: your build honours the key only after its own feature toggle is enabled in system settings, or the key you found is a “capability” flag rather than the state switch. Enable the feature itself manually first, then re-diff the values.
- One-handed mode stays on everywhere: the exit macro’s close event was missed (app killed, not closed) or its variable constraint failed. Add the batch-standard safety: a Home/screen-off check that exits macro-created one-handed mode if the marker is still set.
- The shrunken window is too small to use: set your preferred size in the vendor settings once; the macro toggles state, not geometry.
- It triggers in the car: add the negative constraint (car Bluetooth not connected) — a mounted phone needs its full screen.
- After an update, the key name is different: expected in vendor feature land. Re-run the diff from Step 1 and update the two macros; five minutes, and a good reason this guide taught you the method rather than one phone’s values.
Undo
Disable the entry and exit macros, turn one-handed mode off in its system settings page, and — if you used the ADB grant solely for this — you may revoke it with the command in the grant guide, though most readers keep it for the rest of this category. State returns to stock the moment the toggle is off.
Frequently Asked Questions
Can MacroDroid turn on one-handed mode on any Android phone?
It depends on the manufacturer’s implementation. Some builds expose one-handed mode as a settings key or shell-controllable state that MacroDroid can write after the ADB grant; others reserve it for their own gesture or settings UI. Test your exact model — this guide’s diff method shows in minutes which kind you own — and use the gesture-training fallback if there is no programmatic route.
Which apps benefit most from automatic one-handed mode?
Reach-heavy, portrait, one-thumb apps: messaging, browsers and feeds with top-mounted search and menus, and short-session apps like banking. Camera, games and video should stay full-screen, and maps need a car-connection constraint so a mounted phone keeps its full display.
What is the difference between shrinking one-handed mode and Android’s reachability slide?
Shrinking modes, such as Samsung’s, scale the whole interface into a smaller window for the whole session, which suits per-app automation. Stock Android’s one-handed mode slides the top of the screen down momentarily to reach a control, then springs back — a per-moment gesture aid rather than a session state.
Why use a marker variable in the entry and exit macros?
So the automation only undoes what it did. If you enabled one-handed mode yourself, by gesture, for a different app, a blunt exit macro would switch it off against your intention. The variable records that the macro created the current state, and the exit macro checks it before restoring full size.
One-handed mode will not turn off after I close the app. What is wrong?
Usually the close event was missed because the app was killed or swiped away in a way your build does not report, or the exit macro’s constraint failed. Add a safety net — a Home-screen or screen-off trigger that exits macro-created one-handed mode whenever the marker variable is still set.