
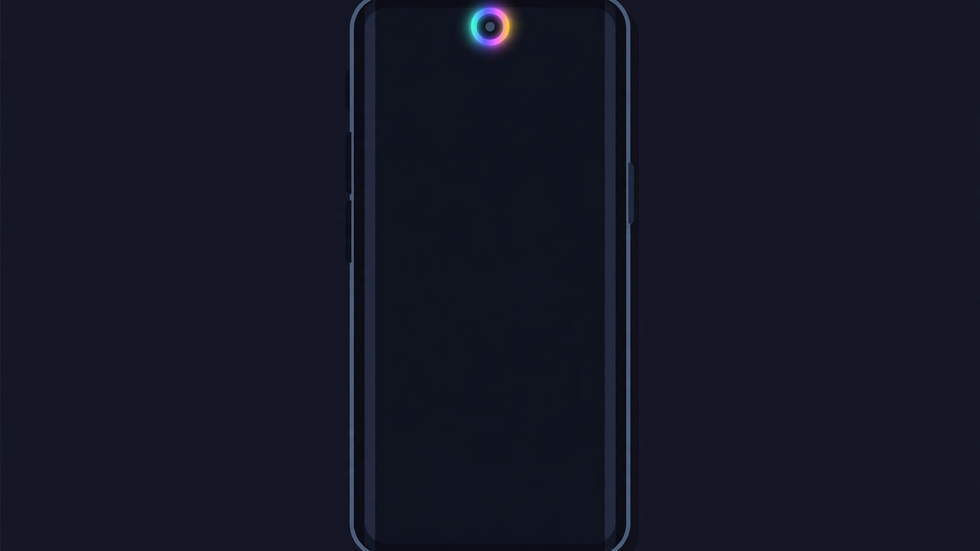
Modern phones hide their front camera in a small punch-hole cutout, and that tiny circle of screen can do more than sit there unused. With MacroDroid’s Camera Circle notification action, the ring around the cutout can glow, pulse, or change colour when something happens — a message arrives, a call comes in, charging starts, or a macro completes. It is a quiet, elegant alert: visible from across the room, silent in a meeting, and far less intrusive than a full-screen flash. This guide shows how to set it up correctly for your specific phone, because cutout position and size vary between models, and a ring drawn in the wrong place looks broken rather than beautiful.
The appeal of a cutout alert is its discretion. A glowing ring tells you something happened without lighting up the whole screen, waking a sleeping partner, or announcing the notification to everyone nearby. It also works when the phone lies face up on a desk, where a vibration might be missed and a sound would disturb others. The challenge is calibration: the ring must align with your actual camera hole, suit your brightness and colour preferences, and trigger only for notifications you care about. Get those three things right, and the feature feels like it was built into the phone itself.
Prerequisites
You need MacroDroid with the Camera Circle notification action available, and a phone with a punch-hole front camera — the feature has nothing to ring around on phones with a notch, a pop-up camera, or an under-display camera. Find your camera’s exact position first: hold the phone upright, note whether the hole sits centred, left, or right, and estimate its size relative to the screen. Some MacroDroid versions offer presets for common models; if yours is listed, start there, but still verify visually. You also need notification access or the relevant permissions for the triggers you plan to use, such as incoming messages or calls. Decide which events deserve a ring — start with three at most, such as messages, missed calls, and charging — because a ring for everything quickly becomes a ring for nothing.
Back up your macros before experimenting with display actions, and set aside ten quiet minutes for calibration. Rushing this step produces a ring that is slightly off-centre, and a slightly off-centre ring is more distracting than no ring at all.
Step-by-Step Setup
Step 1: Create a test macro with the Camera Circle action
Create a new macro with a manual trigger, such as a tile tap, so you can fire it on demand while calibrating. Add the Camera Circle notification action and open its settings. You should see controls for the ring’s position, size, thickness, colour, and animation style. Start with a simple solid ring in a bright colour, such as cyan or amber, with a moderate thickness and no animation yet — animation makes alignment harder to judge. Save the macro, keep it disabled for automatic triggers for now, and trigger it manually to see your first ring.
Step 2: Align the ring with your camera cutout
Look closely at where the ring appears relative to the actual camera hole. If it is offset to one side, adjust the horizontal position in small steps; if it sits too high or low, adjust the vertical position similarly. If the ring is larger than the hole, shrink its radius; if it swallows the hole entirely, enlarge it slightly so a thin gap of screen shows between the hole and the ring. Take a photo of the screen with another device if your eyes struggle to judge the alignment, because a photo freezes the ring and makes small offsets obvious. Repeat until the ring sits evenly around the hole on all sides. Save each improvement, because calibration is a series of small steps, not one dramatic fix.
Step 3: Choose colours and animation with meaning
Once aligned, give different events different colours so the ring itself tells you what happened: green for a message, blue for a call, amber for charging, red for a low battery warning. Keep the palette small — three or four colours you can remember without a chart — and avoid colours that clash with your wallpaper. Then add animation sparingly: a slow pulse for a message, a steady glow for charging, and a faster blink only for urgent events such as a missed call from a starred contact. Animation should attract the eye once, not demand attention continuously. Test each combination in a dark room and in daylight, because a colour that glows beautifully at night can vanish in sunlight.
Step 4: Connect the ring to real triggers
Replace the manual test trigger with real triggers, one macro per event type. A message macro might trigger on a notification from your messaging app, filtered to the apps you care about. A call macro triggers on an incoming or missed call. A charging macro triggers when the charger connects. In each macro, keep the Camera Circle action’s settings consistent with your calibrated ring, changing only the colour and animation for that event. Add a duration so the ring turns off by itself — ten to twenty seconds for a message, longer for charging — rather than glowing indefinitely. A ring that never turns off stops being an alert and becomes a decoration.
Step 5: Add a clear-off rule
Every alert needs an ending. Add a companion behaviour that clears the ring when you unlock the phone, dismiss the notification, or open the relevant app. The simplest reliable pattern is a macro that triggers on screen unlock and clears any active camera ring, so picking up the phone always resets the display. Test this carefully: unlock the phone after triggering a ring, and confirm the ring disappears. If it lingers, check the clear action’s configuration and whether another macro is re-triggering the ring. A lingering ring is the most common complaint about this feature, and it is almost always a missing clear rule rather than a fault in the action itself.
Step 6: Refine for daily life
Live with the setup for several days before adding more events. Notice whether you actually glance at the ring, whether you can tell events apart by colour, and whether the ring ever distracts you during films, meetings, or sleep. If it disturbs your sleep, add a time constraint so the ring does not trigger overnight, or switch night-time alerts to a dimmer colour. If you miss alerts, increase thickness or duration slightly rather than adding sound, because the point of a visual ring is silence. Adjust one variable at a time, and keep a note of the settings that work, so a future phone change or reinstall does not force you to recalibrate from scratch.
Testing and Verification
Test each event type separately: send yourself a test message, miss a test call, and plug in the charger, watching the ring each time for correct position, colour, and duration. Test with the screen on and off, with the phone locked, and in both bright and dark rooms. Test the clear rule by unlocking the phone and confirming the ring vanishes. Test after a restart, because display actions can behave differently on a fresh boot. Finally, test with a case on the phone if you normally use one, since a raised case edge can change how visible the ring is from an angle. Only when every event passes these checks should you consider the setup complete.
Troubleshooting
If the ring appears in the wrong place, return to calibration and adjust position in small steps; do not guess large corrections, and check whether a model preset overrides your manual values. If the ring does not appear at all, check that the macro is enabled, that its trigger actually fired, and that MacroDroid has the permissions its display actions require. If the ring appears but never clears, add or fix the screen-unlock clear rule and check for a second macro re-triggering it. If colours look wrong, remember that some screens shift colours at low brightness or under a blue-light filter; test with the filter off. If the ring works manually but not automatically, battery optimisation is the usual suspect — exclude MacroDroid from aggressive saving and test again.
Tips
Less is more with cutout alerts: a ring for three important events will serve you better than a ring for thirty. Keep a written record of your calibrated position and size values for your phone model, so you can restore them quickly. Pair the ring with a subtle vibration for urgent events only, keeping ordinary events silent. Avoid using the ring for marketing or low-priority app notifications, because every unimportant glow trains you to ignore the important ones. When you change phones, recalibrate from scratch rather than importing old values, because cutout positions differ even between phones from the same maker.
Frequently Asked Questions
Does Camera Circle work on phones without a punch-hole camera?
No. The action draws a ring around a punch-hole cutout. On phones with a notch, pop-up camera, or under-display camera, there is no hole for the ring to surround.
Will the ring drain my battery?
A brief ring uses very little power, especially with a short duration. A ring left glowing indefinitely, however, keeps the screen active and will drain battery, which is why a duration and a clear rule matter.
Why is my ring slightly off-centre?
Cutout position varies by model, and presets are approximate. Adjust the horizontal and vertical position in small steps, and photograph the screen to judge small offsets accurately.
Can different notifications have different ring colours?
Yes. Build one macro per event type with the same calibrated position and size, changing only the colour and animation, so the ring itself identifies the event.
How do I stop the ring at night?
Add a time constraint to the ring macros so they do not trigger overnight, or use a dimmer colour and shorter duration during night hours.